 In honor of the NY Giants big win, (and because my husband and boys are EXTREME Giants fans) I decided we needed something fun for the Super Bowl. I have always wanted to make a banner, so I thought this would be a perfect excuse to try. It was EASY! I am shocked at how simple some of these things are that I am trying. I always looked at things and thought "Oh, I couldn't do that even if I wanted!" Until now...;)
Here are the things you need:
-Material cut into 12 triangles.
-Material cut into 12 squares or rectangles 4 1/4" X 3 1/4 "
-Material for your logo
-Fusible adhesive (This is the stuff you use to do applique and iron on decals)
-Logo of your favorite team!
*Note: For my triangle template I just used an 8.5" X 11" paper and drew lines from the top corners to the middle of the bottom paper and cut out a triangle. Like this:
 (Sorry, it is hard to see!)
Step 1:
Print out your logo, cut it out, and trace BACKWARDS on the paper side of some fusible adhesive.
 Step 2:
Iron on your adhesive to the WRONG side of your fabric you are using for the logo and the squares you are going to put the logos on. with the PAPER SIDE OUT. Cut out after you have ironed on the fusible adhesive. (In the picture I have the sticky part of the adhesive against the fabric and the paper side against the ironing board. Make sure you iron the paper side!)

Now you should have this:
 Step 3:
Ironing all of the pieces together.
Start by peeling the paper off the back of the squares, and then iron them into place. After you have done that, peel the paper off the back of the letters and iron them into place in the squares you just ironed on.
 Step 4:
Pin the flags in place.
* NOTE: I used a piece of quilt binding that was 3 yards long and 7/8" wide. I chose it because it was wide and it gave me lots of room to work with.
Start by laying out all of your flags in a straight line with the top corners touching each other. Leave about 1" hanging off the end of the banner. Now sandwich the quilt binding over the tops of the flags making sure the flags are pushed clear up into the crease of the binding. pin them in place.

Step 5:
Add loops to the ends of the banner.
Get some twine or cording that is about 5" long. Double it and knot the ends together.
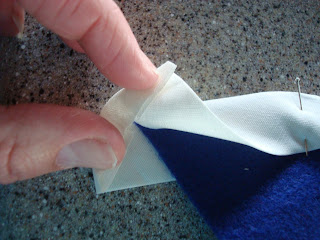
 Now fold the end of your quilt binding in about 1/4".
Fold the sides under on the same diagonal as the flag.
 Now take the loop you just made and place the knotted end in about 1/2" in and tight against the crease.
 Step 6:
Sew it together!
Start by sewing the end of the banner closed and the loops in place. *Make sure to back stitch!*
 Now sew your flags in place leaving about 1/4" allowance from the edge that is against the banner.
 Now you have a fun banner to celebrate your occasion!
 Here it is on my entertainment center. I pinned the middle up for a little extra swag, you could add another loop here if you wanted.
No comments:
Post a Comment